Coral Diseases & Compromised Health Monitoring
Coral Diseases & Compromised Health Monitoring

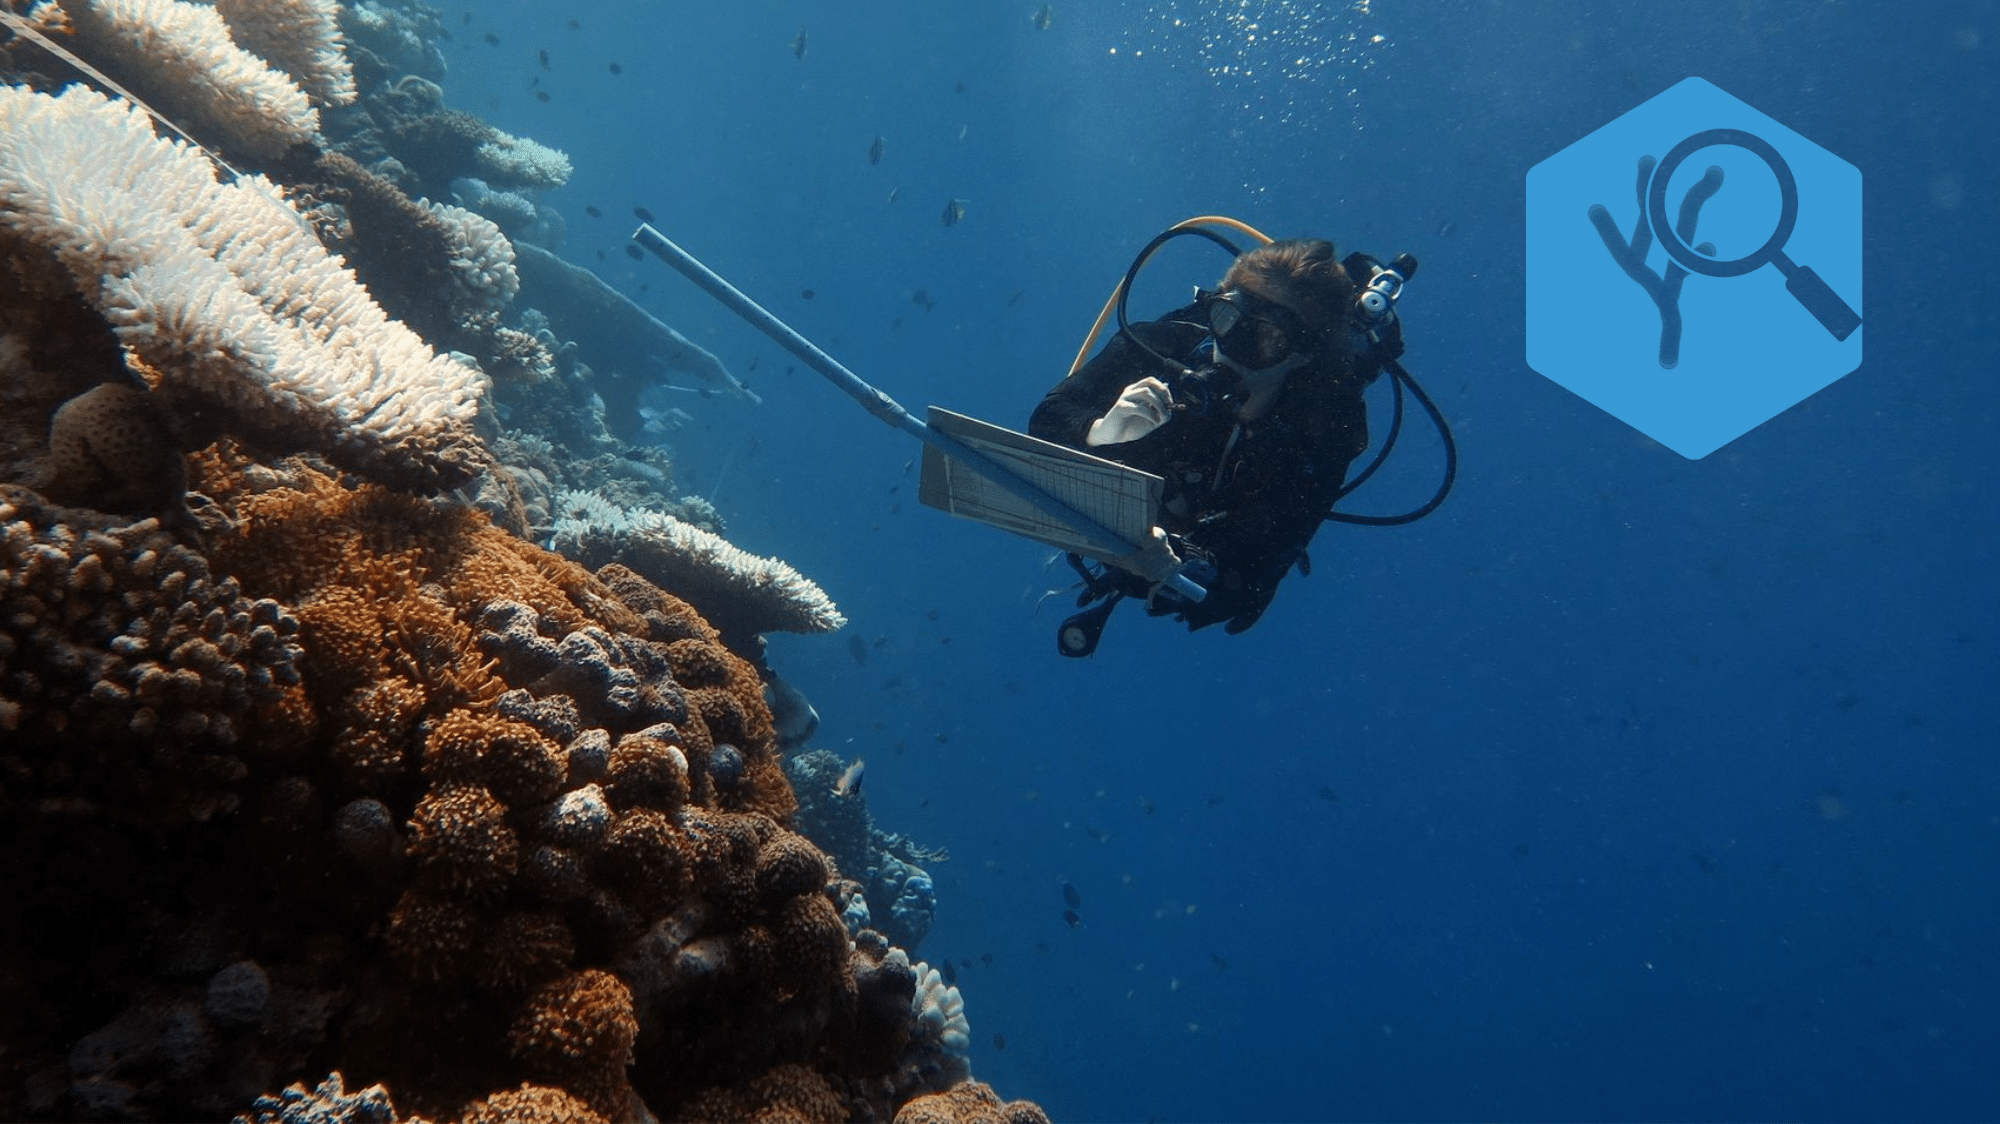
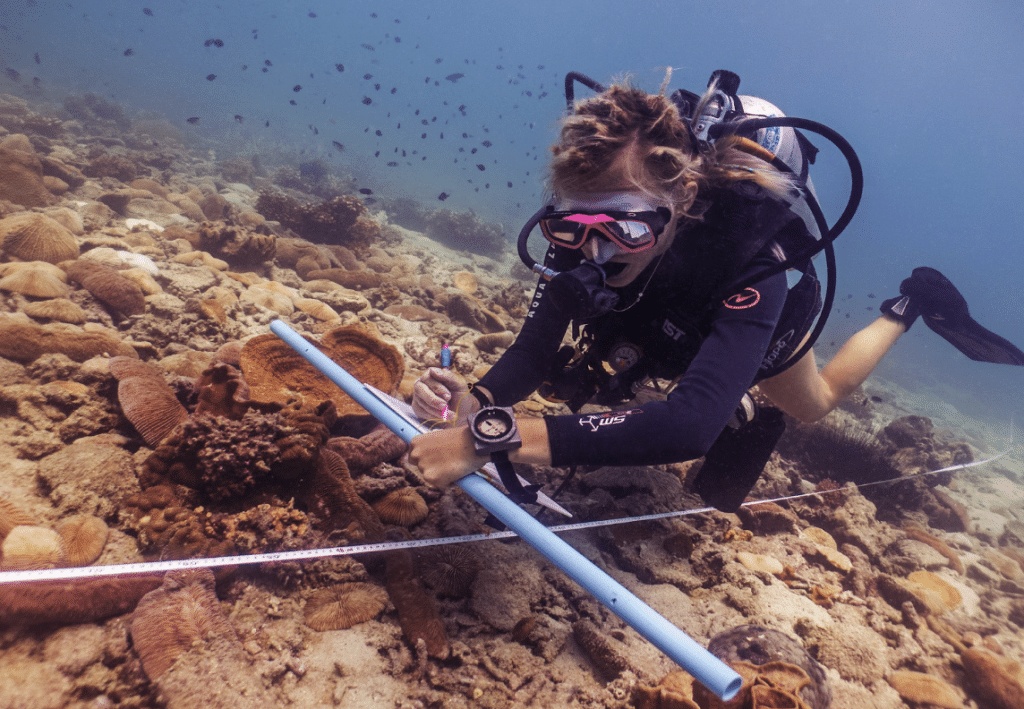
The Coral Disease & Compromised Coral Health Monitoring course is a prestigious certification card for those students who are able to complete all aspects of our Ecological Monitoring Program, and Coral Taxonomy and Identification in theory and practice. When performed to a high level of proficiency, coral health assessment can be incorporated into the surveys. This card recognizes your ability to identify all states of coral health, and contribute to coral disease and overgrowth monitoring, and research.


Prerequisites
- Be 12 years of age or older
- Be certified as an Advanced diver under a leading diving organization (PADI, SSI, RAID, etc) or an Open Water diver who has satisfactorily completed a buoyancy appraisal with a professional diver
- Demonstrate proper diving ability at an advanced Level and be proficient in buoyancy and self-awareness
- Be certified in our Ecological Monitoring Program
- Be certified in our Coral taxonomy & Identification course
Standards
- Understand how predation,
competition, and parasitism play a role in the structure and population
dynamics of the coral reefs - Be Proficient in various survey
techniques used by reef managers to monitor the health of coral reef ecosystems - Be able to identify various
common coral disease of the region - Be familiar with, and able to
identify common causes of coral mortality or compromised health states
Requirements
- Attend the Compromised Coral
Health Assessment and Monitoring lecture and any related knowledge building
sessions - Read and complete the chapter
reviews for the Coral Disease and Coral Bleaching Chapter of the Ecological Monitoring
Manual - Complete and pass all the
written exams for the courses listed above (80% and above) - Complete and pass the written
exam for the Compromised Coral Health and Monitoring course - Successfully perform at least
one Coral Disease and Comprised Health Monitoring Survey - Complete data entry, in the
form of hard copy data sheets or the online database, as required
Approximate course time is 8 hours, with at least 1 dive
Certification Card
Training Centers
- Indonesia - Blue Marlin Conservation
- Thailand - ATMEC
- Thailand - Black Turtle Conservation
- Thailand - NHRCP
The Fight for the Last of Life
Forward
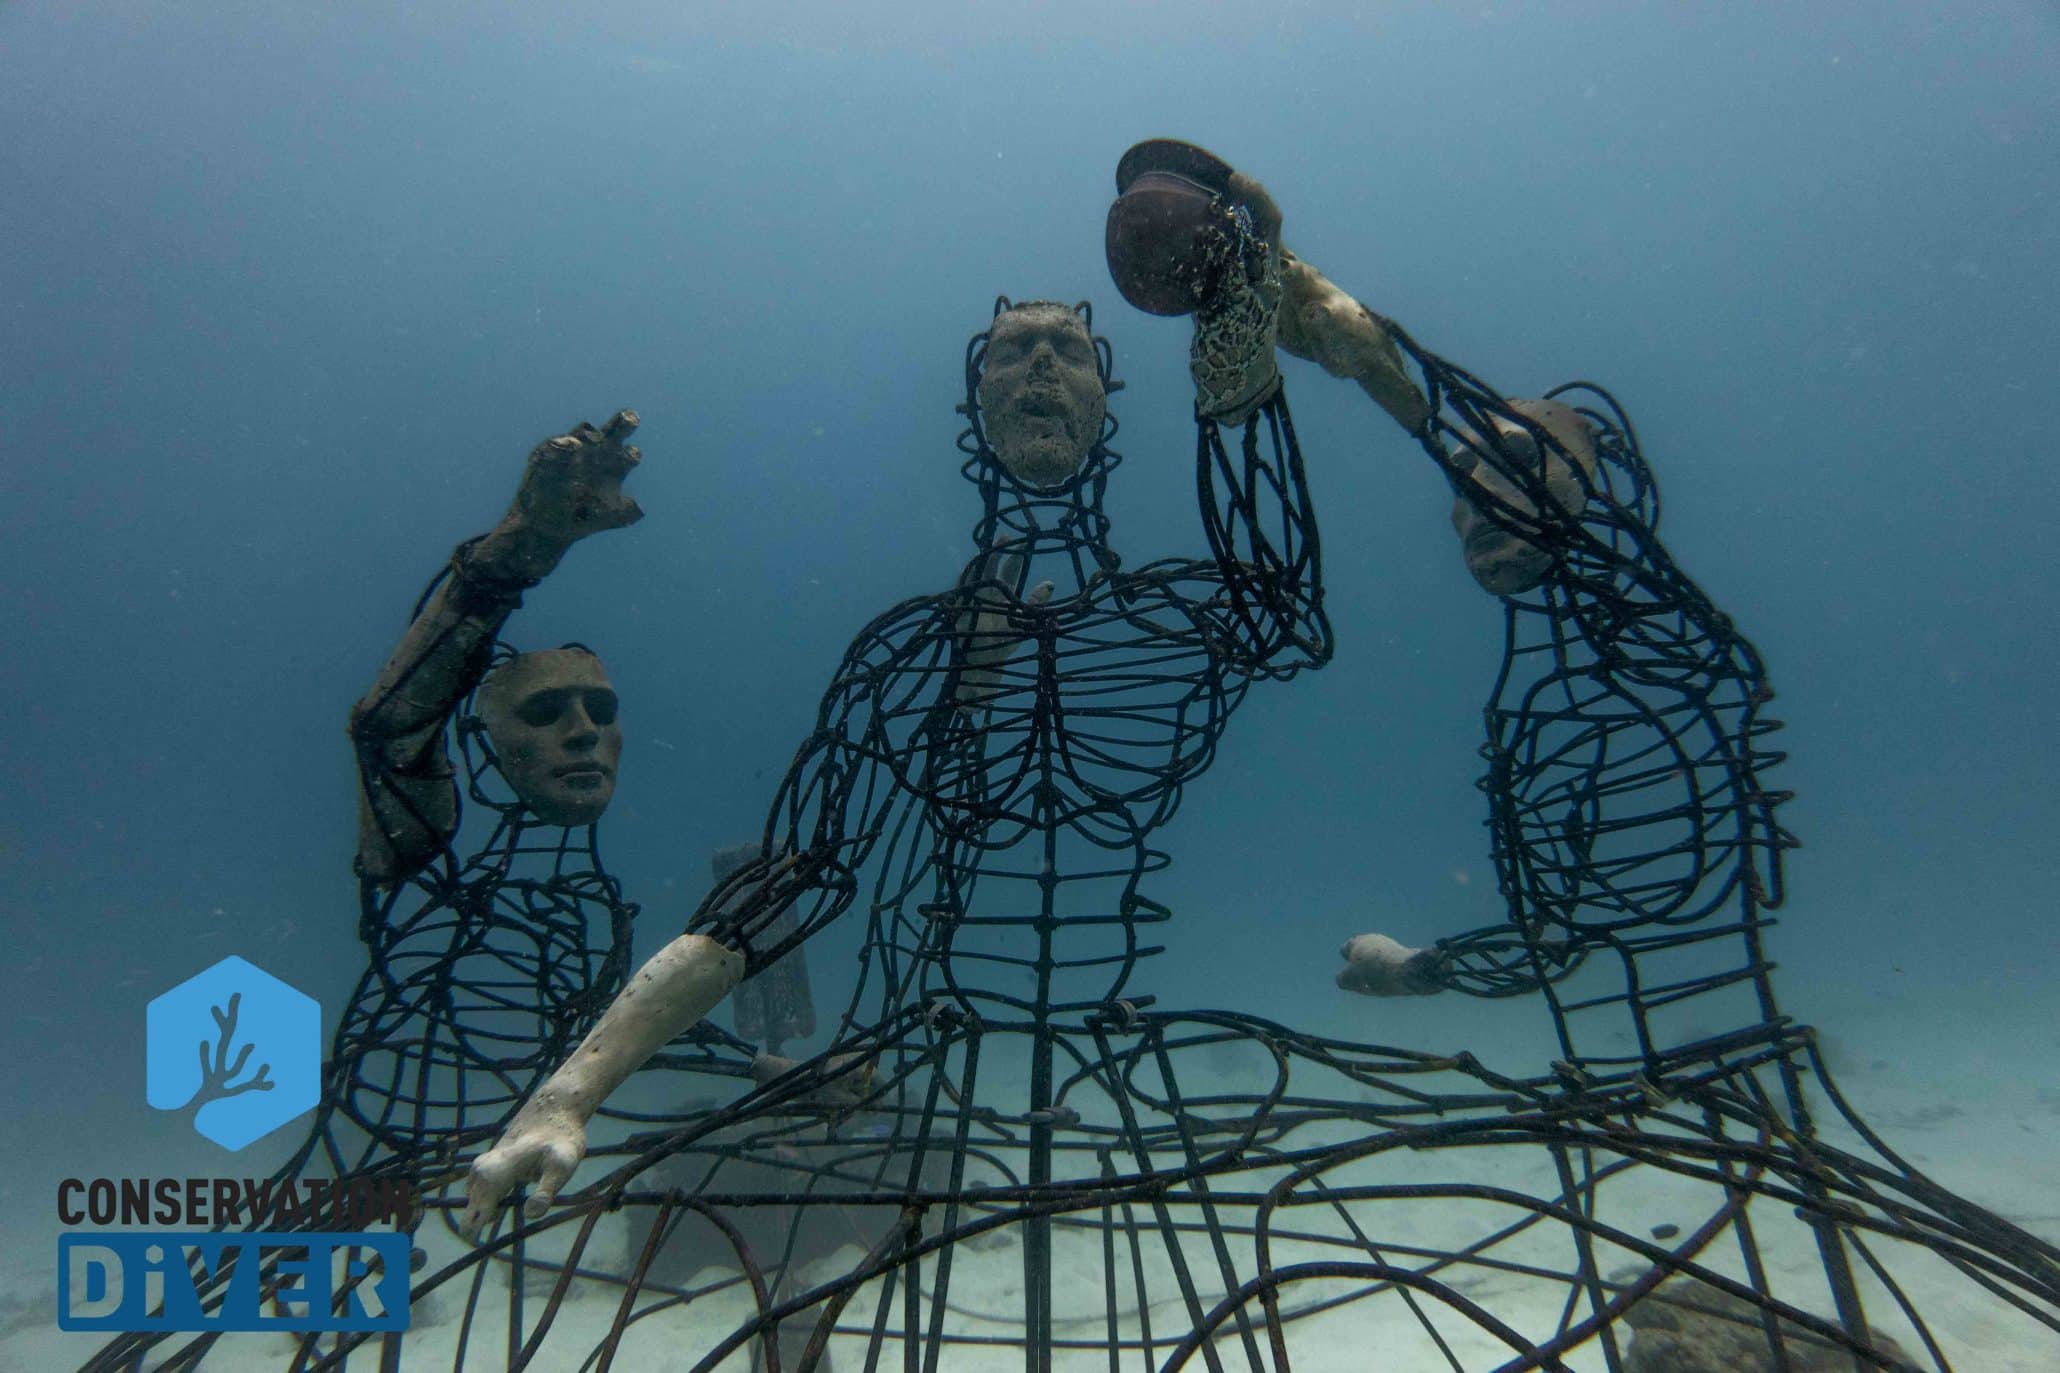
The reasons behind this latest electrified underwater sculpture installation The Fight for the Last of Life, deployed by Conservation Diver, Coral Aid and the NHRCP in Ao Leuk Bay on the 28th of August 2019 (Koh Tao, Thailand) are manifold. The most fundamental and perhaps arguably it’s most important purpose, Read more
Operation Jairo Campaign: Nicaragua

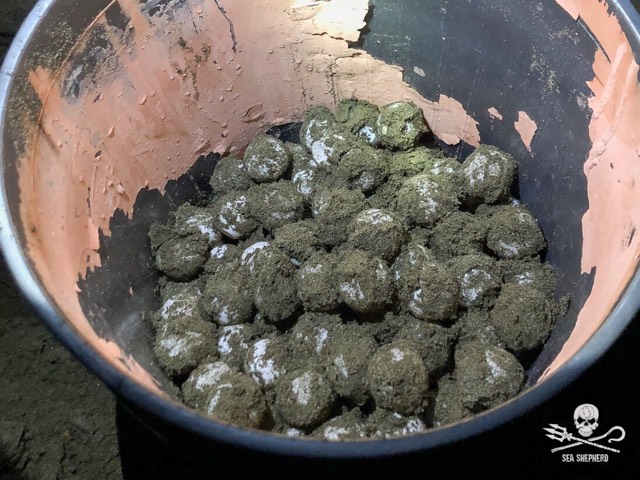
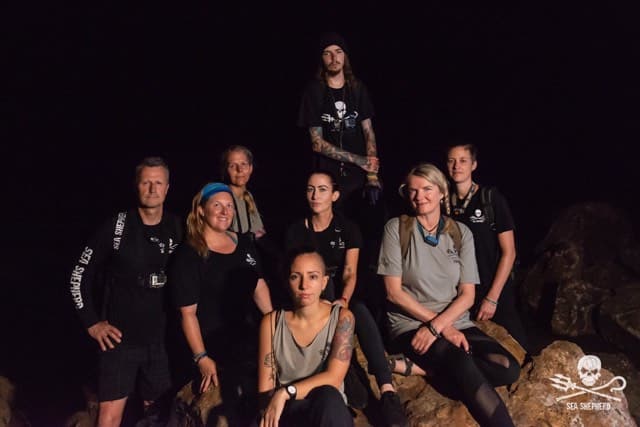
Sea turtles are living dinosaurs, an artifact of the Jurassic Period whose continued survival proves a winning evolutionary design. Although they survived the catastrophe that killed of most animals on earth around 65 million years ago, they are now threatened with extinction due to human activity. To combat this issue, Conservation Diver works in several countries to study, protect, and restore sea turtle populations. One such program is the “Operation Jairo Campaign” in Nicaragua, which is being led by the international ocean conservation group, Sea Shepard.
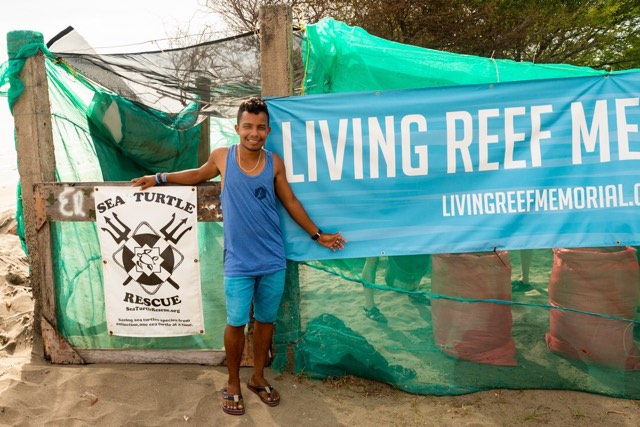
This program helps to rescue eggs, hatchlings, and juvenile sea turtles from both human consumption and natural threats. We first began focusing on turtle protection in Nicaragua in 2016 through the group Sea Turtle Rescue, educating local community members and taking small local actions for their protection. In 2018, we joined with Sea Shepard on the Operation Jairo Campaign, providing local support and volunteers.
Over the next few months, we will be expanding our impact in this program, bringing in more volunteers and increasing the awareness and capacity of local stakeholders. Through a combination of positive outreach, local collaborations, and direct action we hope to greatly improve the conservation status of sea turtles in the country, and help to protect this vital sea turtle hotspot. Stay tuned to learn more about opportunities to get involved, or to participate in our Sea Turtle Ecology Head-starting Certification courses.
Project FAQs
Location: Los Zorros, Nicuragua
Partners: Sea Shepard, Sea Turtle Rescue, Conservation Diver, Azul Conservation (Marine Conservation Nicaragua)
Website/social Links:
https://m.facebook.com/OperationJairo/
https://www.facebook.com/seaturtle.rescue/
https://www.facebook.com/MarineConservationNicaragua/
Contact: George Bevan, [email protected]
Cigarette filters now the top source of marine debris
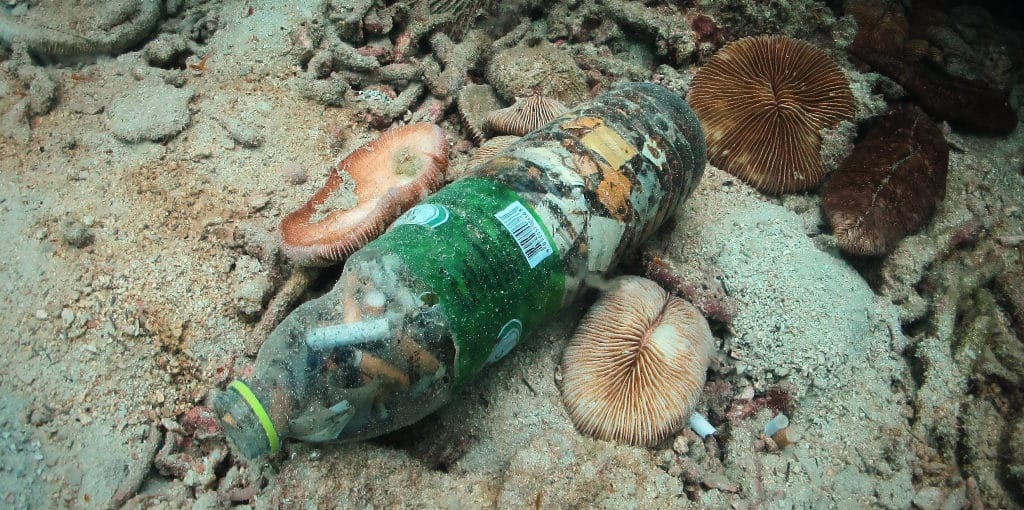
By now we have all heard about how plastics and marine debris are chocking our oceans and killing marine life, but do you know what the number one source of this debris is? Recent studies have shown that the primary item littering our beaches and oceans are cigarette filters. In fact, it is estimated that 4.5 trillion filters are littered to the environment every year, totaling more than 750,000 tons. Studies have found that globally there are about 3.5 cigarette filters per every square meter on our beaches. This is not only unsightly and disgusting, but it is also toxic to aquatic organisms, and is destroying the base of many marine tropic structures.
What’s wrong with Cigarette filters?
Cigarette filters are primarily made of a plastic fiber called cellulose acetate (95%), mixed with a semi-synthetic fiber called rayon. Each cigarette contains more than 15,000 of these fibers. They are not readily biodegradable, and in the marine environment can persist for over 10 years. As they break down, they become smaller and smaller pieces which are called microplastics, and are readily consumed by all animals. A study by the University of Plymouth looked at deep sea marine sediments (3,500 meters deep), and found that there are about 4 billion of these fibers per square kilometer. These deep-sea marine sediments form the largest habitat on the planet, and they are filling up with plastic. But its not only the plastic fibers that scientists are worried about when it comes to cigarette filters, its all the contaminants they carry with them.
Cigarette filters are toxic
When a cigarette is smoked, the filter absorbs over 400 different chemicals, including heavy metals and nicotine. Nicotine is a neurotoxin, which greatly affects the behavior, growth, and survival of many organisms exposed to it. When filters are littered, the nicotine and other chemicals then leach out of the filter and contaminate our waters. Water flowing out of urban areas contains around 60 times the concentration of nicotine that is needed to affect freshwater and marine worms. Each cigarette contains between 0.8–1.9 mg of nicotine, and just 1 filter can contaminate 1,000 Liters of water above the ‘no-effect’ threshold. A 2011 study looked at the effect of the leachate filters on freshwater and marine fish, and found that the LC 50 (the concentration at which half the fish exposed would die) was “approximately one cigarette butt/L for both the marine topsmelt (Atherinops affinis) and the freshwater fathead minnow (Pimephales promelas).”
Cigarette Filters are Killing Marine Worms
Another study from 2015 has looked at how these filter fibers and the chemicals leached from them are affecting marine worms. Marine worms are one of the planet’s most important organisms as they form the base of the world’s largest food web, and also impact water column processes, and global biogeochemical cycles. The study looked at Ragworms exposed to filters and their leachate, and concluded that “Ragworms exposed to smoked cigarette filter toxicants in seawater at concentrations 60 fold lower than those reported for urban run-off exhibited significantly longer burrowing times, >30% weight loss, and >2-fold increase in DNA damage compared to Ragworms maintained in control conditions.” These are highly significant findings, because essentially if these worms die-off, so do our oceans.
Let's stop this now!
Cigarette filters are the world’s number one source of
marine debris. They act as a vector for the “transport and introduction of
toxicants, including heavy metals, nicotine and known carcinogens, to aquatic
habitats.” Urban areas far from the ocean are the leading contributor to this problem,
as the microfibers and leachate from them gets into water ways and flows to the
sea, contaminating the coastal areas and remote deep-sea areas alike.
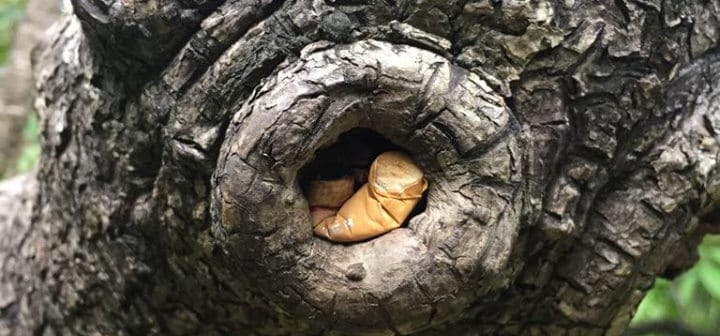
This is a problem which should not exist, as there is no valid excuse for it. The first thing that needs to change is human behavior, people need to understand that these filters are not a bio-material, and do not readily breakdown in natural environments. Second, the companies that produce these filters need to be held accountable. They have long known the effect that they are having on the environment, and the fact that the filters have been shown to be ineffective at removing toxins, tar, or carcinogens from the cigarette smoke. Their primary function is just to keep tobacco from the mouth of the user, and to give a solid mouth piece from which to smoke. They are also cheaper than tobacco and help to make the product look larger. More environmentally friendly and effective materials have been proposed, but they cost more and are thus ignored by the industry. Well, its time we all stood up and stopped ignoring this issue before it destroys our oceans, and us with it.
How to Make Mooring Lines
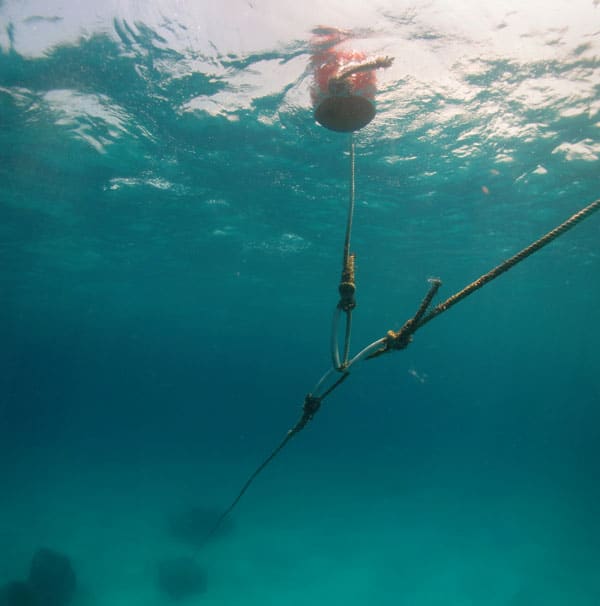
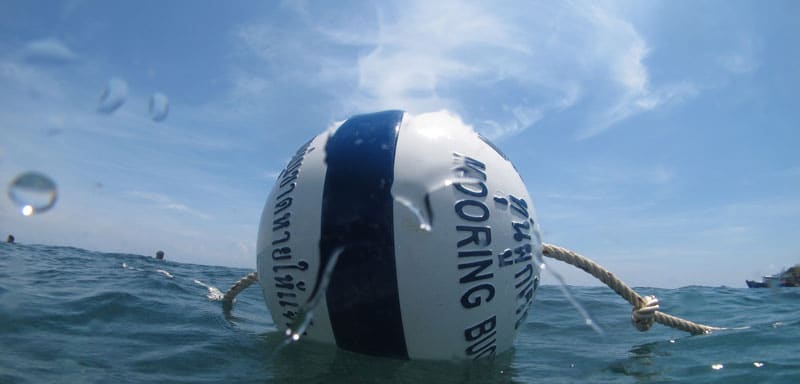
Mooring lines are essential to save coral reefs from damage caused by anchors and boats. Mooring lines can be installed in any areas where boats visit frequently and allow those boats to securely moor up next to a reef rather than dropping an anchor on top of it.
This is critical to protecting reefs, especially in areas of heavy tourism, as a single anchor dropping can destroy decades of coral growth. So, installing and maintaining mooring lines is one of the more important things one can do to protect the future of our reefs, but how many people know how to do it properly?
There are as many ways to make a mooring line as there are people doing it, but here we will present you with the best practices which we have developed over the years. Through our training program, we have installed or repaired hundreds of mooring buoys, all while giving others the knowledge and skills to continue this effort worldwide.
Finding a suitable location to install a mooring
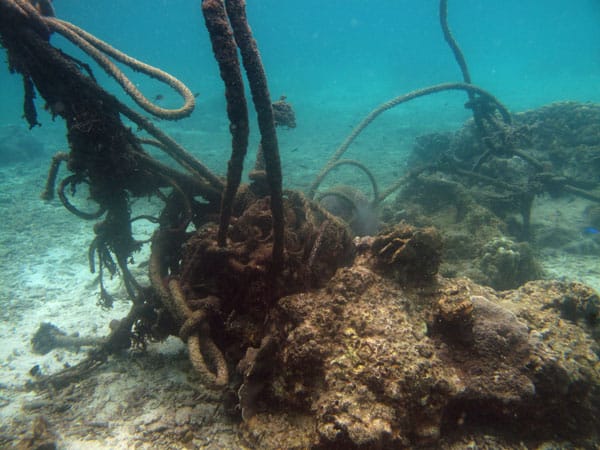
The first step to installing a mooring line is to find where you want it to go. This may include many considerations such as:
- Proximity to the reef for snorkelers and divers
- Seasonal patterns of waves and storms
- Seabed bottom type
- Availability of existing non-living substrates such as large boulders and rocks
Sometimes it is hard to find a suitable location near the reef, as there may not be any natural (non-living) rocks and boulders to attach to. Mooring lines should never be attached to living corals, no matter how large they are, as the ropes can abrade the coral surface as current directions change throughout the year. Furthermore, even though you may design the mooring lines for small boats, very large ones may tie into it, or multiple boats may attach during storms.
The parts of the mooring line
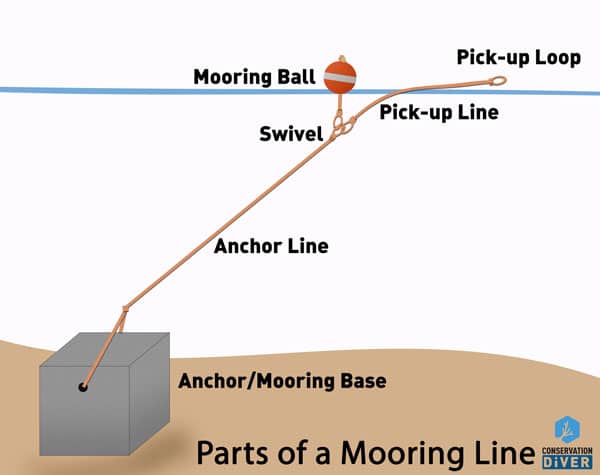
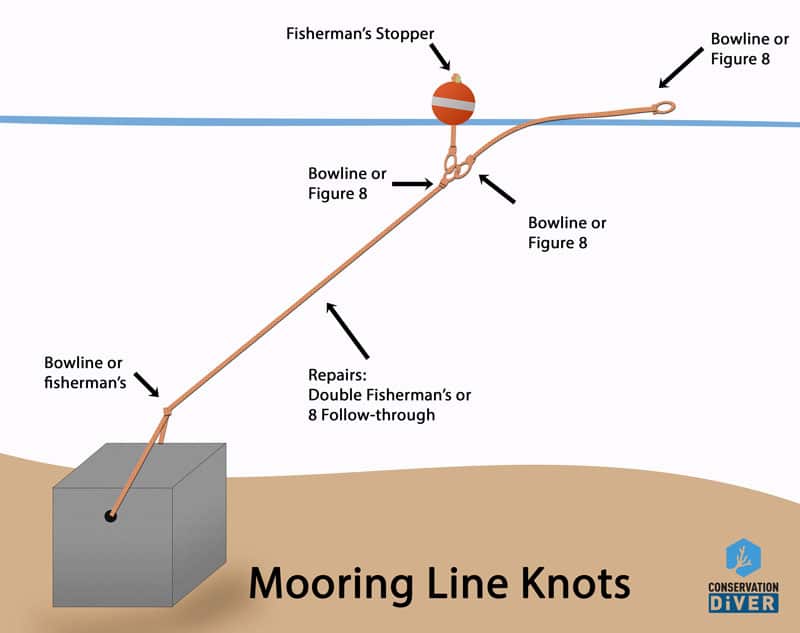
A mooring line is composed of multiple sections, as shown in the right figure. It is better to construct the mooring line this way, as when it is done as one continuous line and breaks, the whole thing is lost. Using this design means that the weakest part (the pick-up line) is where it will break, and you do not lose the mooring ball (often the most expensive part), and it is easy to locate and repair. The parts of the mooring line are:
• The anchor
• The anchor line
• The swivel
• The ball line
• The pick-up line
• The mooring ball
• The pick-up indicator ball
• The pick-up loop
Installing Artificial Anchors to Make Mooring Lines
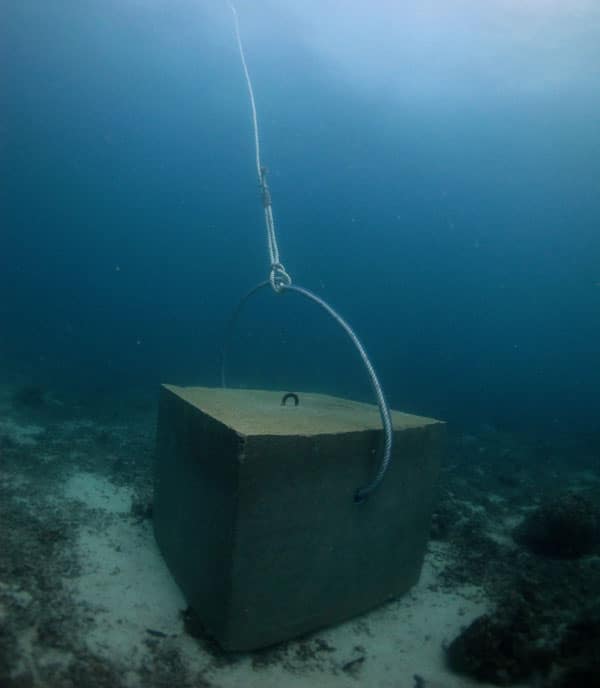
Oftentimes, there are no suitable anchors already existing under the sea for mooring line installations, in which case artificial ones must be created and deployed to the area. These range in design from simple concrete blocks which are dropped by a barge to more complex modular units that can be built in place.
There are also sand screws (such as the Helix screws) that can be used in sandy areas, but in our program, we have found them to be very difficult and expensive to install and have a shorter life span than concrete ones.
The anchors should be very heavy, at least 5-6 tons on land. We have found that having holes through the blocks is better than using metal loops to tie to, as the holes will last as long as the blocks and never corrode, break, or become deformed.
Occasionally, the holes can become fouled and clogged by marine organisms, but it is usually not too much work to clear them. Small mooring anchors made of multiple parts are generally not recommended as they tend to move during large storms or when multiple boats tie to them and can actually cause more problems to the reef.
The Mooring Anchor Line
The anchor line should be the strongest part of the mooring line, so usually, it is made using a thicker diameter rope or two ropes in parallel. The anchor line runs from the anchor to the swivel loop, just a few meters under the water surface.
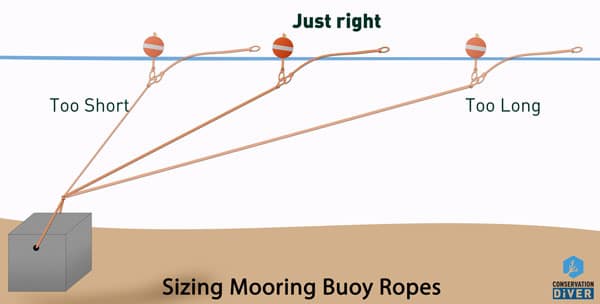
The anchor line should be made long enough to run at about a 35-40° Angle towards the surface. If it is too short, then it is more likely to break under tension, and if it is too long, it may become entangled at the surface or risk being run over by a boat at night.
The Swivel Loop
The swivel loop is not actually a swivel but a place to attach the other parts of the mooring line. Most often, the loop should be reinforced using thick vinyl tubing to protect against abrasion and wear. This loop should be very strong and should be under the water when the mooring line Is not in use.
The Mooring Ball Line
The ball line is used solely to attach the mooring ball to the anchor line, and should never be integrated with the pick-up line, as is often done by beginners.
The reason is that the ball is likely to abrade and wear the anchor line during use and then will be lost when that line breaks. As the balls are very expensive, this line should be made strong and not designed for any boats to attach to. That way, when the pick-up line is broken (which is a guarantee over the life of the mooring), then the ball will still be there, marking the location of the mooring and allowing for fast and easy repairs.
The Pick-up Line
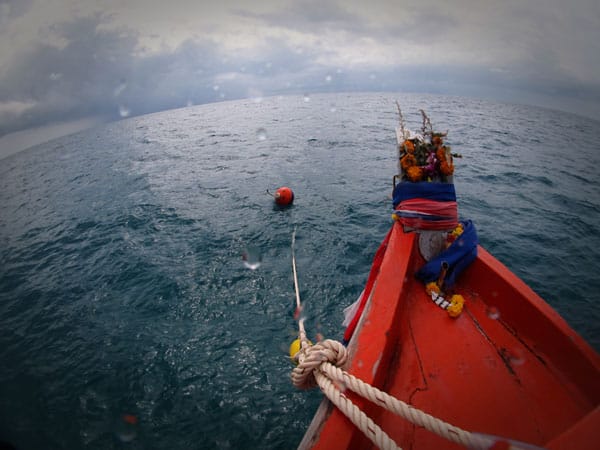
The pick-up line is usually about 4-6m long and rests on the water's surface when not used. The line Is usually marked with a small float so that it is obvious and facilitates the boat captain to easily pull up to it and grab it.
Boats should not use the pick-up line directly to attach to but should instead extend the line using the rope on their own boat, making the mooring line more secure and less likely to break with larger boats, multiple boats, or during storms. Like the swivel line, the loops on the pick-up line are ideally reinforced with vinyl tubing to protect them from normal wear and tear.
Knots to Repair or Make Mooring Lines
One of the most important things to learn about when installing mooring lines (other than proper anchor selection/installation) is knots. They can be a bit daunting for the uninitiated, but give them some practice, and over time you will find they are pretty straightforward and very useful in everyday life.
There are 5 knots used for setting up mooring lines, and they are generally part of a class of knots called dynamic knots, meaning that they adjust or flex with the rope and do not reduce the rope's integrity.
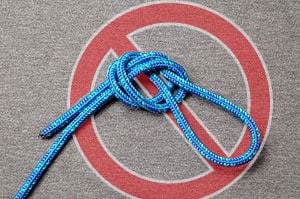
The opposite of a dynamic knot is known as a static knot, these knots tend to only tighten with the rope and never release the tension they store. You will already be familiar with these knots as they are the ones you can never get undone once they are tied. The most common static knot is the overhand knot, which is also the simplest.
When an overhand knot is tied into a rope, it creates a pinch-point and does not allow energy to be absorbed along the length of the rope, thus when the rope breaks, it will generally do so right at this knot. For this reason, we never use the overhand knot or other static knots when constructing or repairing mooring lines.
The knots we do use include:
• The Bowline
• The Fisherman’s and Double Fisherman’s
• Figure 8
• The Figure 8/Bowline on a bight
• Half/Whole Hitches
You should be familiar with and practice all of the knots with multiple rope types because when you are in the water and are dealing with a rope that is 30mm in diameter or more, this can be pretty difficult even for experienced knot tie-ers.
The Bowline Knot
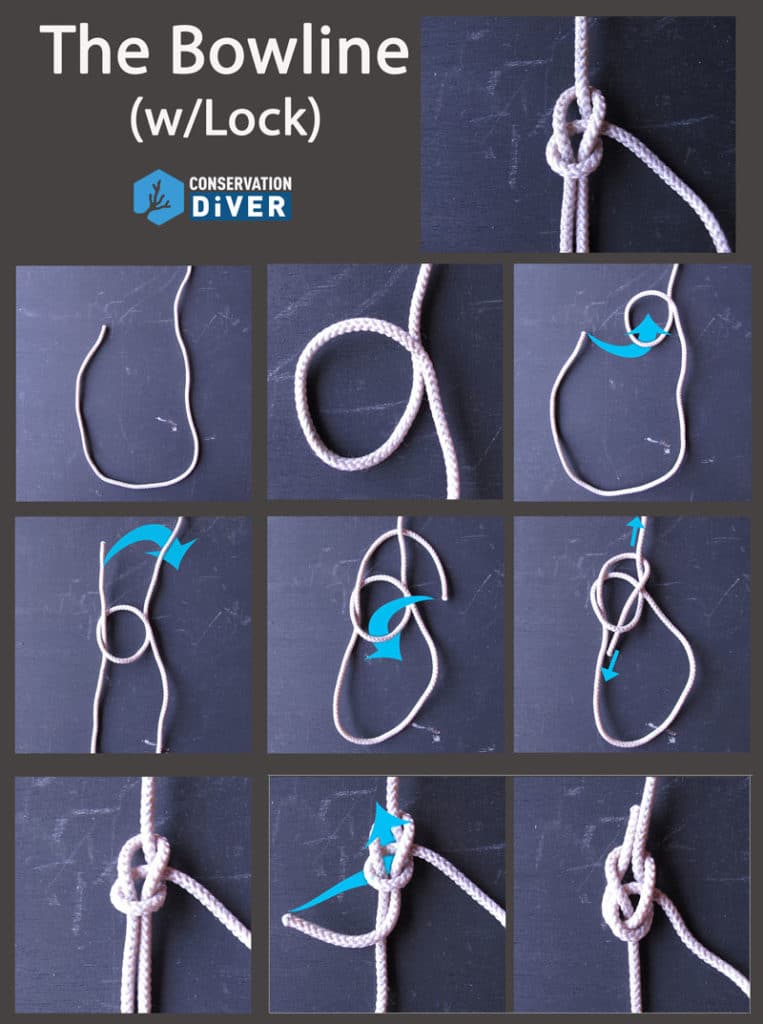
The Bowline is probably one of the most essential knots you can learn, whether it be for diving, climbing, sailing, or any other outdoor activity.
It is a knot that is easy to tie, uses very little rope, is nearly unbreakable, and is also easy to untie, no matter how much force has been applied to it.
In mooring line construction and repair, this knot is generally used in the following applications
- Attaching the anchor line to the anchor point
- Creating the swivel loop
- Attaching the ball line of the pick-up line to the swivel loop
- Creating loops in the rope for other purposes
It seems like a complicated knot to master, but once you do, it becomes quite intuitive and both quick and easy to tie or untie. Be sure to check the knot before swimming away, as it is also one of the easier knots to tie wrongly, which will come untied.
The Fisherman’s Knot
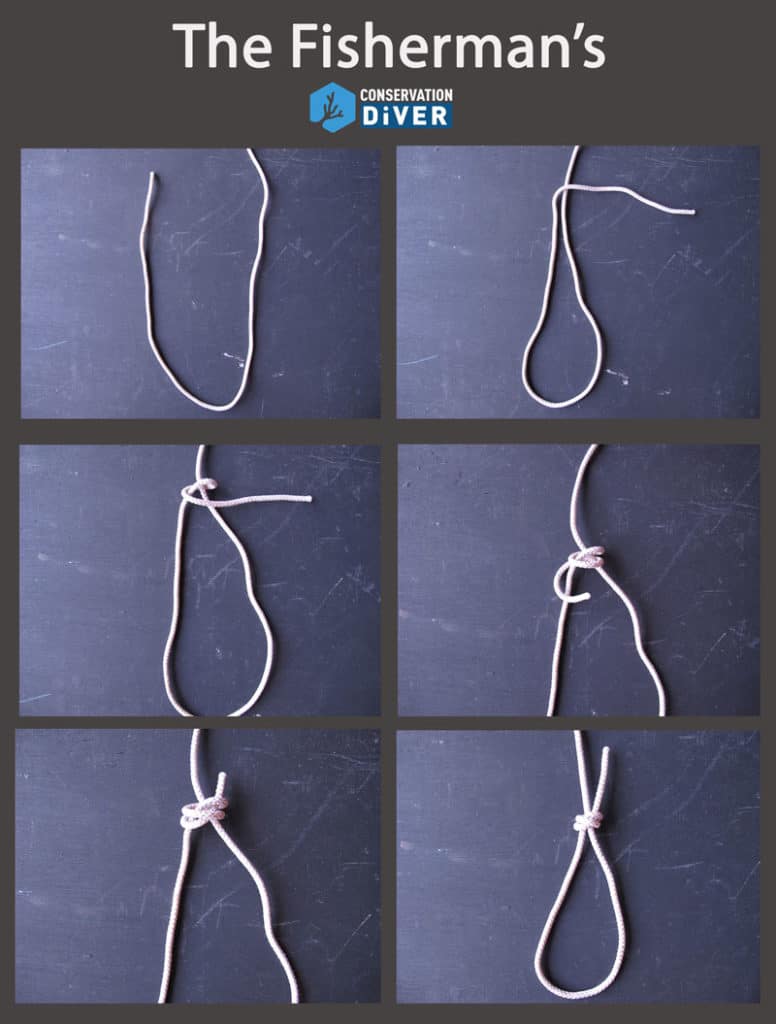
This is a great knot that can be used in a wide variety of situations when you need a secure dynamic knot that will not come undone.
Unlike the Bowline, this is generally a permanent knot, meaning that after tension is put on it, you will not be able to get it undone. However, it does not reduce the rope's integrity or interfere with energy absorption.
The normal fisherman knot can be used to attach the anchor line to an anchor point, especially if you need a ‘slip-knot’ that will tighten around the object as force is put on it. It can also be tied around itself to create a stopper knot to secure the mooring ball to the ball line or prevent a rope from fraying or unraveling.
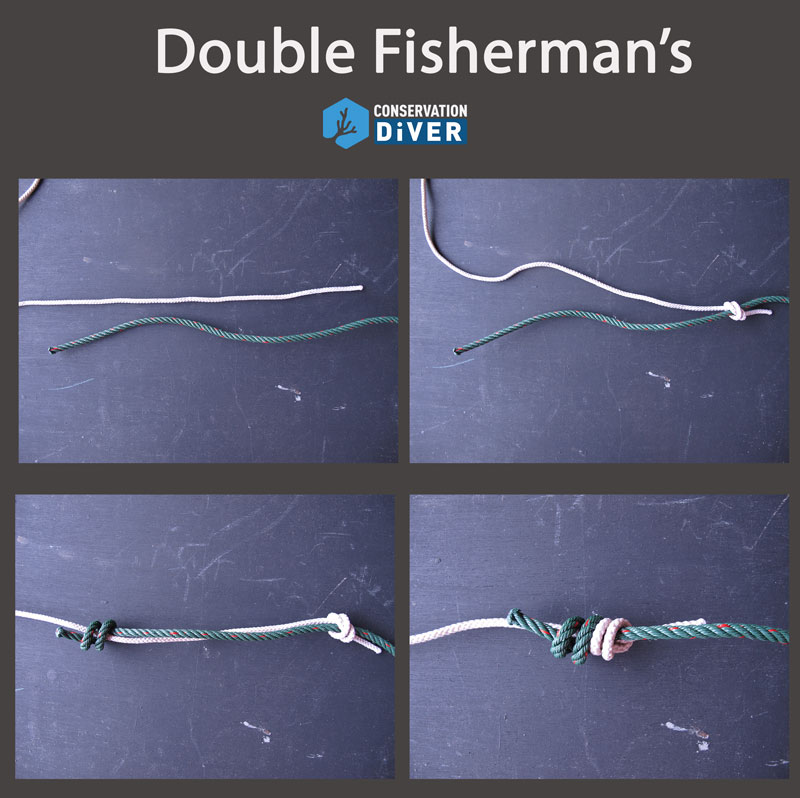
This knot can also be tied in what is called a Double Fisherman’s, which is the best way to attach two ropes together when they are of different sizes or materials. Even very large ropes can be attached to very small ones quite securely, and with using little rope for the knot. This is the knot to use in cases where you are repairing or extending an existing rope.
The Figure 8 Knot
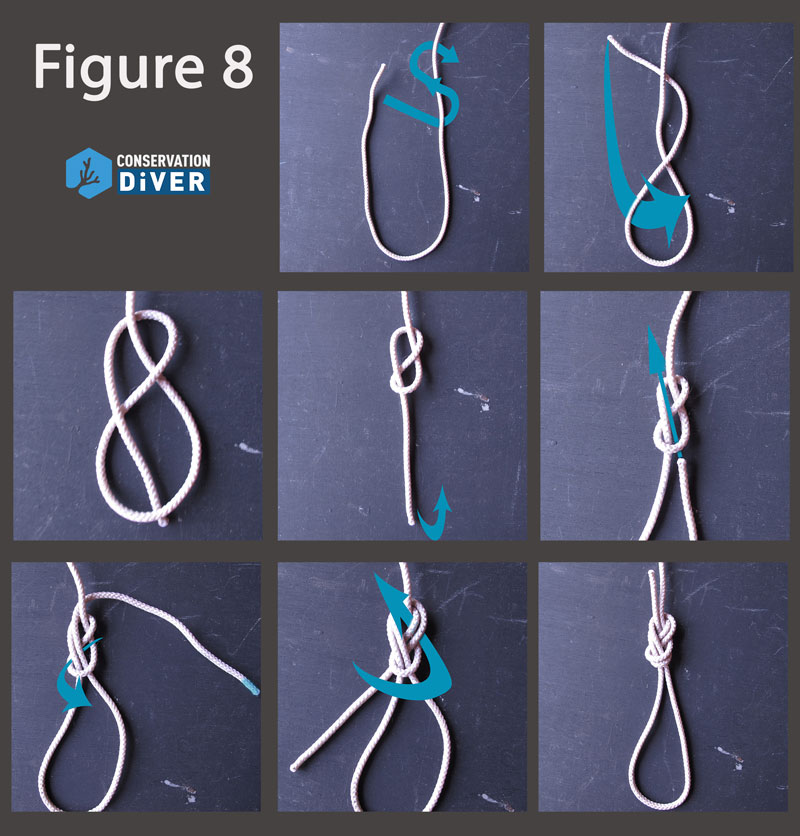
The Figure 8 Knot is a secure and dynamic alternative to the overhand knot and is almost as simple. Essentially it is the overhand knot with an extra twist in it. This twist eliminates the sharp turns of the overhand knot, which reduce the rope strength so severely, and also more easily facilitates (but not always) the ability to untie the knot after force has been applied to it.
This knot can both be used to create loops in the rope (like the Bowline) or to attach two ropes together (but only if they are the exact same size, material, and degree of wear).
If two different sizes of rope are tied together with this knot, there is a good chance of the smaller or softer one slipping free. Also, the knot uses slightly more rope to create a loop than the Bowline so is generally not preferred. However, it is both easier to tie and easier to check if it was tied correctly than the bowline generally is.
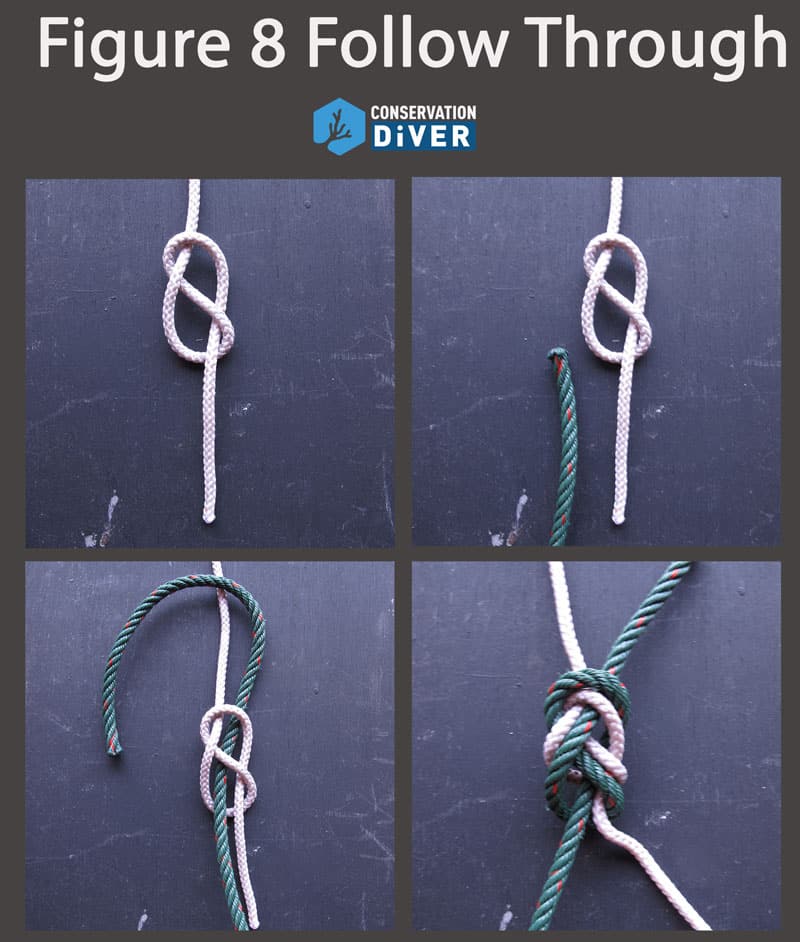
Bowlines and Figure 8s on a Bight
‘On a Bight’ simply means doubled up and is used when you need to make a loop in a rope and do not have anything else to be tied in it (other loops can be integrated later using either knot typically). This can be used to create the loops at the swivel or at either end of the pick-up line. It is also possible to integrate vinyl tubing by placing it on the rope before the knot is tied.
Half and Full Hitches
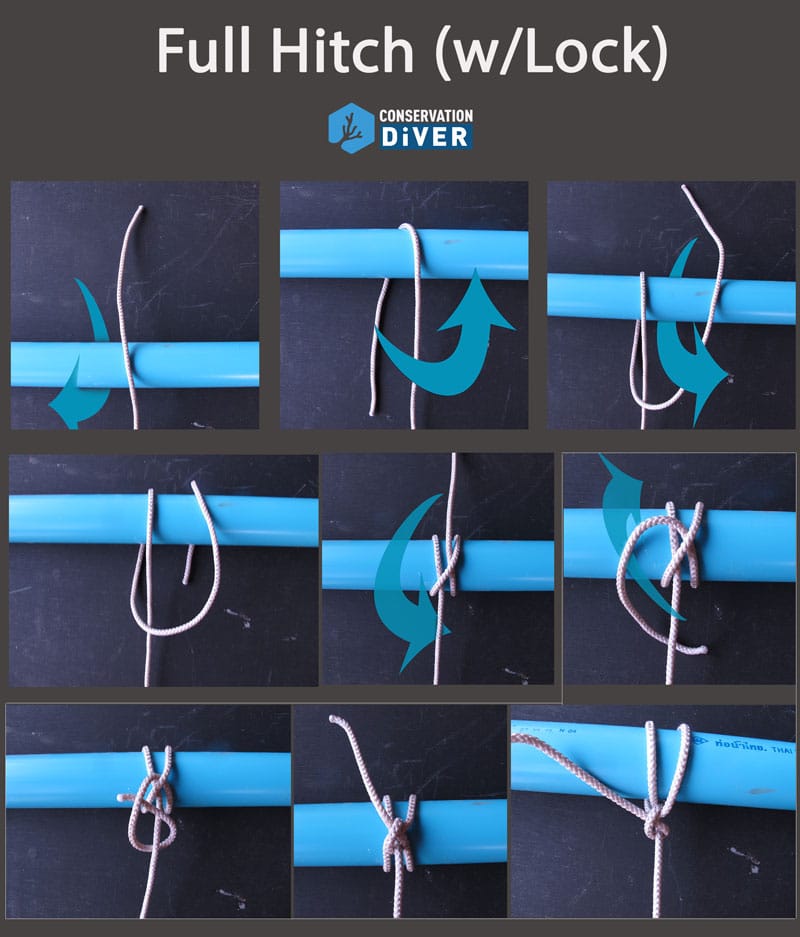
Hitches are some of the simpler knots and, in the case of mooring lines, are used to tie back-up knots with any extra rope, to tidy up old mooring lines, or to protect knots/ropes from abrasion.
They should never be used to tie the rope onto anything, as they are not very strong, are not dynamic, and are tedious or nearly impossible to get undone.
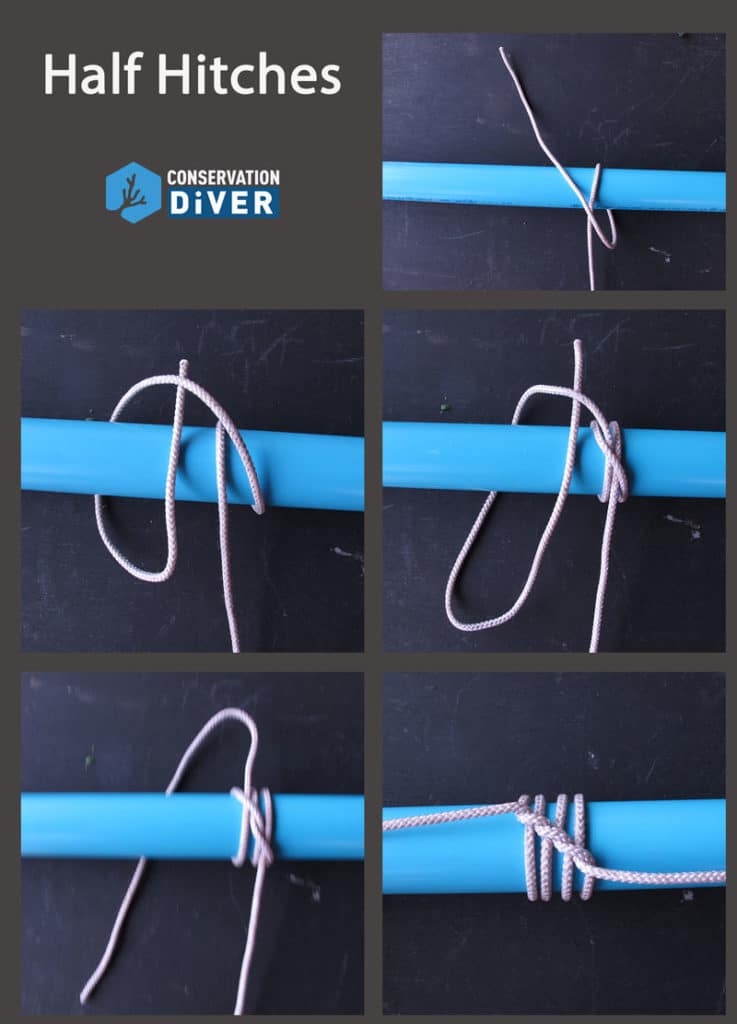
Now that you know all the basic parts and knots needed to tie mooring lines, these skills need to be practiced often, or they will be forgotten, so make it a bit of a game on the boat to tie them during down times or on surface intervals.
Installing and maintaining mooring lines is a vital skill for any diver, not just reef managers or conservationists. The use of anchors should really only be done in the deeper seas or in emergency situations. These days with all the money coming in from coral reef tourism, there is no excuse for anybody dropping anchors when they could be establishing mooring lines in the areas where they frequent instead.
Corals Have Evolved to Eat Sea Slugs
Hard corals are generally thought of as autotrophs, or organisms which produce most of their own metabolic energy and contribute to the base of the food chain in the ecosystem. Although most reef-building corals do feed on plankton, they meet 75-95% of their energy demands by harvesting symbiotic micro-algae within their tissues, and are thus getting their sugars and carbohydrates indirectly through photosynthesis. However, this view of corals is currently in debate, and it looks like a more diversified diet could be utilized by some corals to meet their daily energy demands. This has been the study of Conservation Diver Instructor and Board Member, Rahul Mehrotra.
Investigating what corals can eat
Initially, Rahul showed back in 2015 that Heteropsammia corals used their large mouth size to opportunistically consume salps during seasonal blooms. This was observed In Situ on several occasions in the ‘muck’ areas around Koh Tao, and documented in the journal Marine Biodiversity. By chance, a student of the New Heaven Reef Conservation Program, Joel Rohrer observed a mushroom coral ingesting a sea slug during a coral reef survey, and alerted it to Rahul’s attention. From that single observation, investigations began into the question, “Are reef building corals actively feeding on sea slugs for additional energy?” A question which would take 4 years to investigate.
Experiments were devised as a series of both in situ and ex-situ trials to test his hypothesis, which was that corals take advantage of their proximity with Sacoglossan sea slugs and their large gape to facilitate heterotrophy. The experiment looked at several factors, the size of the coral, the size and species of the sea slug, and the likelihood of ingestion. He used aquarium feeding trials to test whether or not it was even possible for the mushroom corals to capture, transport, and ingest the slugs, and looked at the rate of rejection based on slug size and species. Following those trials, he also performed field tests to ensure that this adaptation was actually going on in the wild populations.
The study’s conclusions
Based on 240 trials, it was concluded that prey species and prey size are the greatest factors in successful predation of sea slugs by corals, rather than the type or size of the corals themselves. Of the six species of prey slugs tested, consumption rates were highest for species of the genera Costasiella and Elysia, with significantly less success when attempting to ingest those of the Plakobranchus genus. Additionally, when these sea slugs were rejected after consumption by the corals, the slugs were covered with a mucus that is thought to be a defensive mechanism by the corals to prevent damage caused by the slug’s defensive measures.
What this means
Rahul’s work has helped to expand the way we think about coral feeding behaviors, as well as their place in the trophic structure of reefs. We now know that they feed on large plankton (salps and small jellyfish) in addition to the nearly microscopic prey they have always been known to. Furthermore, we now see that they are actively feeding on benthic organisms, not only those floating in the water column. This may be an adaptation to increase the amount of energy they receive from heterotrophy to allow them less reliance on their symbiotic algae, or as a way to gain beneficial micro- and macro-nutrients that could be essential for their growth and development. Additionally, the data adds to the incredibly sparse understanding on predators of sea slugs (which are all toxic) and overall ecology in tropical reef habitats. As these new observations are investigated further, we are sure they will yield some more surprising and exciting information which will continue to modify our views of this very important class of reef organisms.
The full paper is available free of charge from the publisher's website
Coral Fragging Should be Banned
Recently, there has been a great increase in conservation groups participating or dedicating their entire program to coral 'fragging,' or propagation, in order to increase the number of corals on the reef. This has been done with the understanding that they are saving the coral reefs by increasing the abundance of corals, but this practice could be leading to the further decline of the very reefs they are attempting to save. It’s a practice that should be immediately stopped. Programs that fail to understand the genetic implications of their work, and fail to address the multitude of stressors acting upon the reefs will at best be unsuccessful, and at worst contribute to the further decline of coral reefs and the resources they provide.
Our Newest Marine Conservation Trainer, Leon Haines
Congratulations to our newest marine conservation trainer, Leon Haines. Leon got his start in marine conservation in 2014 when he conducted an extended internship at the New Heaven Reef Conservation Program in Thailand while attending the Van Hall Laurenstein University in the Netherlands. While at the program, Leon concentrated on the assessment of the Crown of Thorns Starfish around the island, and in 2015 completed his project titled “The dietary preferences, depth range and size of the Crown of Thorns Starfish (Acanthaster spp.) on the coral reefs of Koh Tao, Thailand.”
According to members of the Koh Tao team, Leon was a charismatic and hardworking intern who made every effort to enrich his knowledge and skill levels. He was a great team member and team leader who also worked independently to pursue a deeper understanding of the threats to the world’s coral reefs.
Following his internship and training, Leon traveled the globe to explore and join other volunteer projects before settling in at the Blue Marlin Dive center in Gili Air, Indonesia. There he will be setting up his own marine conservation program and will begin by teaching coral reef ecology, coral reef monitoring, coral nursery techniques, and artificial reef methods and uses according to the standards and requirements of Conservation Diver. His goal is to “to raise awareness amongst divers and teach people what they can do to help preserve the fragile ecosystems we rely upon so much.”
We wish Leon all the best of luck on his endeavors, and are confident that he will make an extraordinary Conservation Diver Trainer. We encourage all visitors to the area to contact him, and drop by to say hello or help out in his efforts.
Teaching the Deep Dive
One of a SCUBA divers most memorable training moments is often their first ‘deep dive’. The thrill and adrenaline of knowing that you will be going more than 18 meters below the ocean waves, below the realm of most swimmers or snorkelers, and into the territory of the ocean abyss. But upon descending, most quickly realize that their fears of the deep are unsubstantiated, and in fact going to 30 meters is not that much different from 16 meters in terms of perceivable effects to the human body. For this reason, dive instructors around the globe have been coming up with fun, interactive, and informative ways to show divers the physical effects of descending down where pressures are more than double that of the surface.
Some of the most common tools used are color charts, which allow divers to see the differences in light levels at depth due to the preferential absorption of red light. Another technique is to get divers to take a short quiz at depth, to show how brain speed can be slowed down due to the biological effects of an increased partial pressure of inert nitrogen gas. Unfortunately, a more recent practice has been the act of bringing down an uncooked egg to show the effects of increased pressure. In this technique, the egg is brought down to depth and cracked, at which point the egg white can be removed and the yolk remains intact. Generally, then the students will have a moment to feel or toss around the egg yolk, before continuing the dive.
With hundreds of thousands of people learning to dive each year, this can add up to a lot of eggs introduced to fragile coral reef dive sites. The act of using an egg to demonstrate the effects of increased pressure is not a sanctioned skill by any leading certification organization, and may also have detrimental effects to marine life. Some of the reasons why this practice should be discontinued include:
- Breaking eggs under water violates two rules and regulations, the first being fish feeding and the second being throwing food waste into the sea in a coral reef area. These practices are not allowed on most reefs as it contributes to increased nutrient and macro-algae levels which contributes to coral reef degradation. Herbivores and detritivores fish which should be eating algae and waste off the reef instead are eating food from boats or divers. The behavior of the fishes also changes, leading in some cases to attacks on divers or snorkelers (for example, see the Phuket case of a diver who lost a finger from a moray eel who was accustomed to being fed sausages by divers.)
- Uncooked chicken eggs, especially those which are industrially produced, contain many foreign bacteria, viruses, hormones, anti-biotics, and prions that can increase the prevalence of disease among fish, coral and other marine life.
- As the eggs are brought down in plastic bags and often wrapped in paper it contributs to marine debris.
- The egg technique is not the most effective nor educational means of teaching the deep dive, and does little to truly teach divers about the environment. Techniques using sanctioned teaching materials (such as color charts) or reusable items (such as inflatable sports balls) are already adequate and have been proven to increase a divers understanding of the effects of diving below 18 meters while still being fun and interactive.
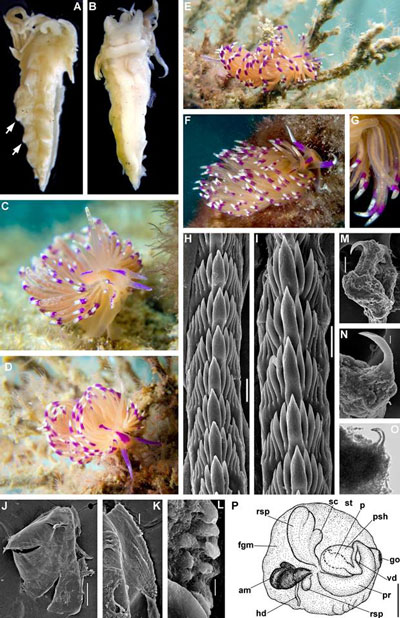
The Koh Tao Team Makes a New Nudibranch Discovery
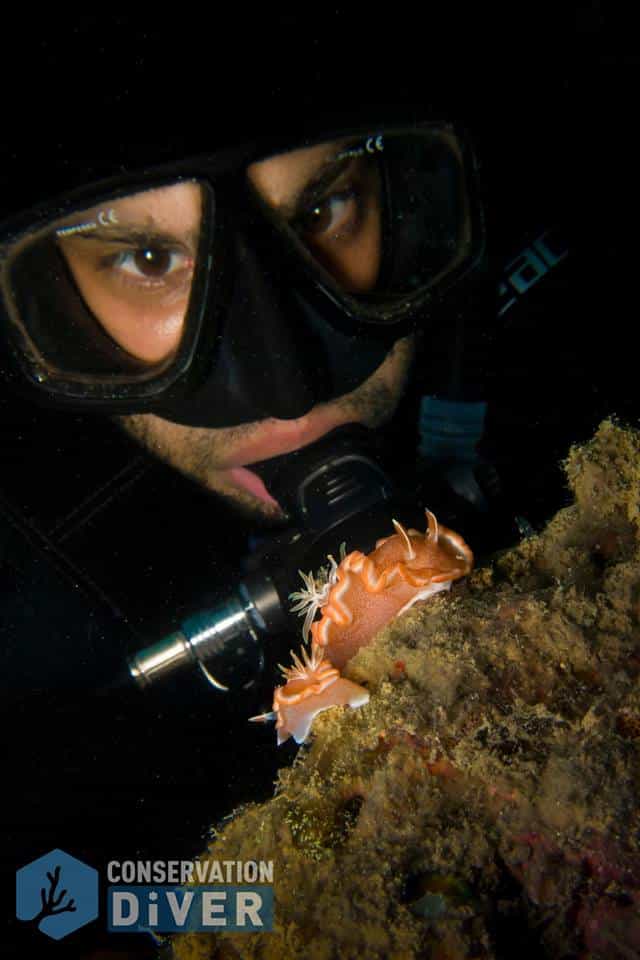
A new discovery of a species of nudibranch was recently described by our partners on Koh Tao, the New Heaven Reef Conservation Program. The previously undescribed species was first recorded on the team’s coral nurseries in 2009, while instructors and students were preforming their regular maintenance duties. They did not initially realize the importance of their discovery, and were merely mesmerized by the beauty of this unique sea slug.
Later, Conservation Diver trainer and long-time NHRCP instructor, Rahul Mehrotra realized that this species was new to science while working on a paper related to his PhD. Rahul then worked with other researchers to describe the animal, which is now known as Unidentia aliciae.
This is the third nudibranch species which has been described from Koh Tao through Rahul’s work (also Arminia occulta and Armina scotti), bringing the number of known sea slugs from the island to a total of over 150 species, with several more undescribed species recorded. Rahul, and the team at the NHRCP are continuing their efforts to document and increase the knowledge of the biodiversity of the island’s reefs in a concerted effort to protect it. You can read more about this story on their website.
